Category Archives: Pastimes

Dolly Dress Form

Based on some instructions for making a duct tape dress form, I used Enchy’s doll to make a mini doll dress form.

American Girl doll duct tape dress form

Here’s how I made it.

  1. First, I wrapped the naked doll in plastic wrap.
  2. Then I covered it with a piece of fabric. This was to represent the t-shirt that is used in the sample instructions.
  3. Next using masking tape I did one layer of tape around the fabric. Mostly I used this type of tape because I knew I would not have enough duct tape and because I thought it would be more flexible for this small dress form. Next was a couple layers of duct tape, I added some partial sleeves at this point.
  4. Now I had to carefully cut the tape off the doll without damaging the doll. I cut up the front and up one sleeve. The other sleeve came off without cutting once I had enough give to pull it off.
  5. I taped the cut lines closed.
  6. I had some old candle sticks that I never use that I realized were the perfect size to be a stand. yippiee! I cleaned off the wax and dust, clipped off the leaves and put it up the middle of the duct tape form.
  7. I stuffed the form with recycled stuffing that I get from Charger’s destroyed toys.
  8. I taped up the bottom and I am done!

I was thinking about covering it with some nice fabric, but that will add more bulk, which will make the dress fitting less accurate. At this size mere fractions of inches will throw off all the measurments. The layers of tape and fabric already make the fitting a little different from the actual doll. It doesn’t need to be pretty… Perhaps when the girls don’t need doll clothes made for them anymore I will cover it and make it an artsy dress form sculpture that is not meant for the fitting function.

What’s on your Christmas list?

I have several great art books on my list. What are some of your favorites? What books are you IN?

First on the list, Exhibition 36: Mixed Media Demonstrations + Explorations by Susan Tuttle. I just discovered this book and promptly added it to my wish list. Seth at Altered Page mentioned her current giveaway for her new book. Of course her book fits into the style of all the other books already on my list and it sounds really cool. A virtual tour and interview of 36 different artists! From the great reviews on Amazon I am thinking that this book will be great for my classroom too. I always like to show my students artists that are LIVING and making current work that is attainable. The old, dead men that did big bronze sculptures and oil paintings seem too far from their world. So Susan is offering a giveaway for her book, you just need to Mention her book and giveaway in a blog post. So here we are…

Next up is Mixed-Media Self-Portraits: Inspiration & Techniques by Cate Coulacos Prato

This one looks good and has artwork from many artists that I know from Artfest and online blogs that I follow. Actually, this is mostly how I find books that I want usually. If someone mentions their book online, or one in which they have work, then I am interested and curious enough to put it on my wishlist. I think I saw this on Kelly Rae’s blog. Most of my work is in the realm of self-portrait so I am curious how other people approach the topic.

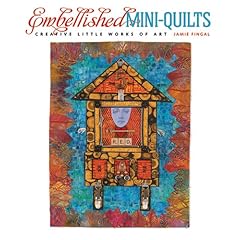
This one I saw in the fabric store and knew it needed to be in my collection… But since it is December, I am banned from buying things for myself. Embellished Mini-Quilts: Creative Little Works of Art by Jamie Fingal. I probably should only have fabric related books on my list anyways, since I am trying to limit myself to fabric work. I need to purge all my paper supplies, since I just don’t work in that medium any more. This book has many projects that fit my style and others that don’t but that is typical. But I would love to stretch myself into some new fabric techniques, this seems like the perfect book to do it with. Jamie has a great website and makes journal quilts, abstracts and portraits that are whimsical and wonderful.

Perhaps my art twin?

I apparently have found my art twin. Over the years when I was primarily working with collage on glass, and showing… I always wondered if someone else was doing the same type of thing. I had seen painting on glass… but never collage. So today this guy, Mike, from France posts a comment on my blog and it seems that around the SAME YEARS as me, he was also doing collage on glass.

Then as I look to his bio I see that he is born in a year and date very close to me. So we are both 40 something geminis (me: 05/25/67 him: 05/27/65) He also does performance and installation arts, both types that I admire and he writes quite a bit. He is very diverse in his creations as I have been… we just went off in different directions.

So anyways, for the time being I will think of him as my art twin… and I will continue to keep an eye on his work. You should check it out as well!

My Mask Keeps Changing

My Mask Keeps Changing, originally uploaded by stilettoheights.

I have to say, and in only 3 days, Seth’s newest edition to the PULSE is going to change my life. I am discovering some new wonderful artists. Yet, I have barely read through half the list of artists. WOW!

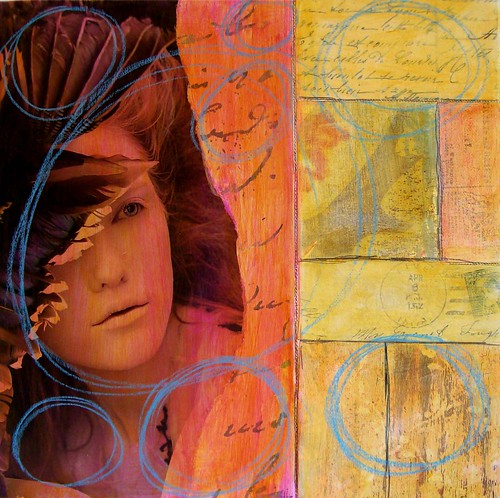
Jennifer is my new favorite artist! I discovered her on Seth’s PULSE. This entire set is to die for! I love her style and her sense of sophistication is stunning. I thought they were digital at first, but after reading descriptions at etsy, it looks like they are all paper and paint. She is self publishing several books of these collages, some with poetry.

Here is what she said about her style:

Um….I am pretty wordy so this is hard for me, but here goes. My work is mixed media collage based, heavily influenced by emotion and a sense of longing. Pieces are shrouded in metaphor and color to create visual poems.(not sure if that makes any sense to anyone but me)

She has a great etsy shop and has self published some books that I think I HAVE to buy!

If you haven’t checked out Seth’s Blog yet… get over there right now!

Challenge #15

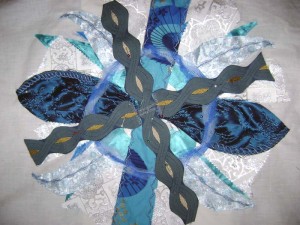
This is a work in progress of a WATER mandala for Stretch Yourself Challenge #15 for July 2008. The challenge is to create works of art the represent the five elements; earth, wind/air, fire, water and Aether/the void. Since the five elements are a spiritual guide, I felt that representing them in mandala style was fitting.

So far this piece is comprised of recycled party and prom dresses, a silk kimono, carpet samples and a plain white sheet. All of the dress fabric is some kind of recycled scrap that I received from my late Aunt Minnie. I still have some sequined dress that I am trying to work in and I need way more blue. Going with swirls and curls to get a wave/water type feeling. I am also trying to really incorporate texture with the unusual combination and layering of the fabrics. I believe this might become a tote bag to take to the pool for my swim sessions.

I will share more when it is finished. And the other elements as they are created this month. Still working on techniques from my Fiber arts book too.

Summer Reading

Open Book, originally uploaded by smellyknee.

I spend a good part of any day reading books. I read books while eating, while sitting in the sun in my garden and even while watching TV. Summer is my favorite time to really get out and read. I love my local library! So lately, I have been reading a lot and thought you might like to know what!

Recently I picked up a bunch of art quilting books to get me more inspired to MAKE ART! Turns out I accidentally grabbed two from the same author. I was enjoying her quilts and thought, “wow, these two artists really have similar styles.” then I looked at the authors, duh! Same one 6 years apart. Ruth B. McDowell I have been pouring over her Art & inspirations” and “Fabric journey : an inside look at the quilts of Ruth B. McDowell I am now very interested in seeing some of her piecing pattern books. She has a very complex way of piece quilting that looks amazing!

I also re-found a book that I looked at over a year ago,”Collaborative quilting” Authors Morgan and Marston have worked together on many quilts, but I love this book for the ideas on “liberated” versions of traditional quilting blocks.

Since I am interested in teaching about fiber arts in my classes next year, I picked up a book about Faith Ringgold, “Dancing at the Louvre : Faith Ringgold’s French collection and other story quilts” Her quilting style is very unique and definitely about story telling. Something I would like to include more of in my own work.

365 day 2: Art Lives Here Doll

My final fabric books (this time around) are two on textures. My favorite part about using fabric is the physical and visual textures that you can create. But my quilts have been so flat lately I wanted some tips on adding more.  “Stitched textile collage : innovative designs for textured surfaces by Toumi and “Fantasy fabrics” by McCaffery both offer a number of ideas. I was not very impressed with Fantasy Fabrics actually. This book was all about capturing different materials behind sheer organza and tulle. Something I did on a doll in a class at ArtFiberFest. I did like the technique, but I don’t think there needs to be a book exclusively written to the idea. And although the style of images in Stitched Textile Collage were not for me, I did like the techniques and textures.

In addition to the fiber art books I am also reading some fiction. I tend to read either Young Adult fiction (so I can recommend things to my students and stay in touch with them) I am really into the Fantasy/sci-fi series about some kid travellers my MacHale. I just finished The rivers of Zadaa. I look forward to finishing the series.

Now with all these books that I am mostly reading simultaneously… I need some BOOKMARKS! In my Google Reader today I found the coolest How-to for a picture bookmark. SO I guess I am set to find the perfect photo to accompany my daily reading.


Walk on This?

Floor Cloth

My final day of ArtFest 2008 was Judy Wise’s floor cloth class. It was not a first choice (I wanted the waxy layers one).  I was pretty envious of what I saw coming out of some of the classes that had been my top choices. Plus the room was tiny and therefore SO crowded that it was just uncomfortable. Here we were painting large canvases and the table space we each had was barely the size of our canvas. We had to watch out for paints and elbows, while storing most of our supplies on the floor. I held my paint palette in my hand most of the time, which was tiring, something I am not used to at all. Despite what could have been a horribly bad day… I got into the right head space, adapted for my needs in order to enjoy the time to paint. Of course I injected collage elements… it is impossible for paper to stay OUT of my work.

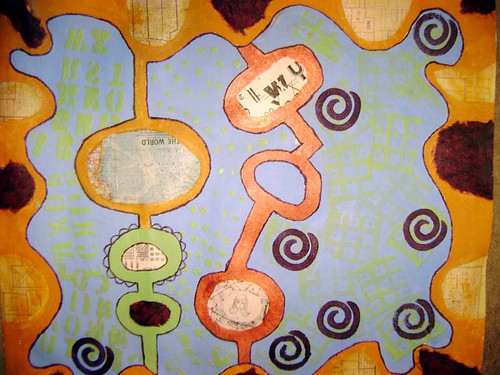
Judy went over some hints about prepping your canvas to be a floor cloth. She gave out a lovely color pamphlet and showed us a bunch of her canvases. Then we got right to work. I know I was tired and overstimulated at this point in the retreat, but I don’t feel that I really learned anything new in this class.  I only spent a few hours on this before it felt finished, and I was FINISHED. I cleaned up early and went back to nap. Since I haven’t painted in this size before, I was actually impressed with my final project. This piece started my ideas for my current series about journeys.

I won’t be walking on this! I do have a bunch of unstretched canvas that might someday become a floor cloth. For now this one will be named “Girl Traveller

Who’s Your Dada?

SMdsc04095

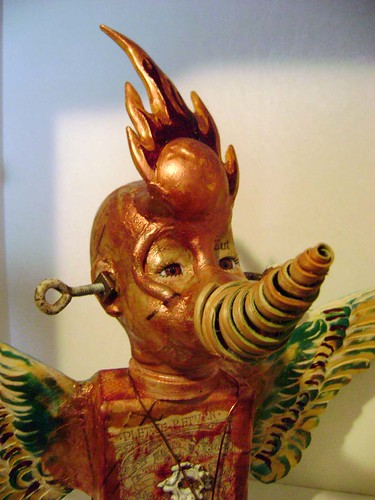
My first class at Artfest 2008 was Opie and Linda Obrien for Who’s your Dada Dolls. We all received the same head and block for a body, but it is amazing the different things that came out of that class. I find that incredibly fascinating, the different ways to solve the same problem that can come from a group of very creative people. (Here are some examples from show and tell night) I was also amazed at how little Jen brought with her… I had tons of stuff! but her work was amazing none-the-less. I kept offering her some of my junk… but apparently she likes a challenge.

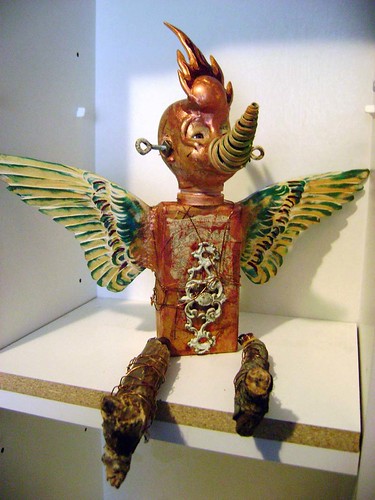
Opie and Linda are a hoot and I learned some VERY cool things about apoxie sculpt. A material that I had never heard of let alone tried. On my first piece, I really only used the apoxie as an attachment substance. It worked well to connect a plastic comet to the doll head and the heavy wooden wings to the wooden block body. The material takes paint easily and blends in to the sculpture, in addition to being a super way to attach awkward pieces. I would love to explore it more, perhaps. I really want to move beyond mixed media and sculpture in general to focus more on fabric. I do love sculpture so who knows what I will do! I wish I had learned more about wire and sculpture attachments but Opie and Linda had too much desire to do things for their students.

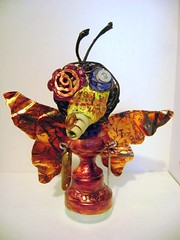
SM100I brought some wings that have been in one of my mixed media drawers for awhile. These went on my body right away. But then I was stuck on how top heavy my piece was turning out. While I pondered this problem, I walked the room to see what other people were creating. Then I worked on some more sculpting material on a second piece, also with wings. I am not much of a clay sculptor, but I was so impressed and inspired with what some other classmates were designing, I had to try something a little more textured and design oriented. This little bug was the results.


 Luckily on the walk back from lunch I found a couple of sticks that looked like they were legs with high heels. Turns out they were the perfect finish to balance out my first piece. I love these two dolls together, so I have named them “Little Boy Bird and Bitsy Bug“ 

SMdsc04096

Dark Shrine

Artfest: Michael DeMeng Class

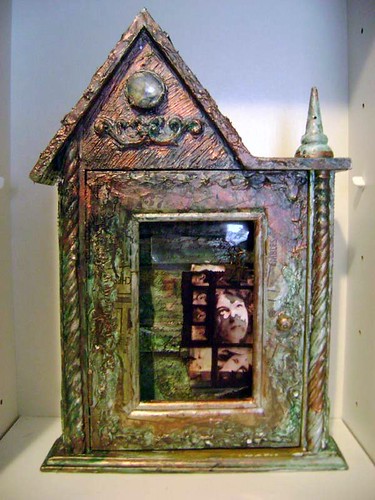
I can’t believe that I haven’t blogged about my ArtFest Projects! This is my project from Michael DeMeng’s Transparency Collage Class. The supply list included a 5’x7″ frame. I hoped that he meant the picture hole part should be 5″x7″ and thankfully I was right. This frame was actually something I found in the art asylum over two years ago. I painted it silver and planned to turn it into a shrine. Unfortunately, it sat around and gathered dust as I did not find inspiration. I was glad to be able to turn it into something unique.

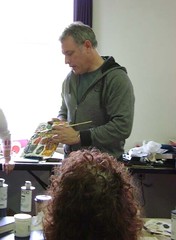
Michael DeMeng’s transparency class was held in the art asylum which ROCKED! We were able to look for lots of extra cool things to add to our assemblages (said with a Michael accent) I really did learn quite a bit in this class. I learned some new words (although they are coined Michael words) like the “usuag” actually not sure how to spell it but it stands for the usual colors he likes to mix. He shared a lot about mixing paints, creating washes and layering. He shared how to put a wash over metal (heat it with a heat gun first) He also talked about how assemblage is all about problem solving and that you need a ‘visual bridge’ to bring pieces together. . I didn’t take any notes or do any journaling this year, just wasn’t into it, but I wish I had written a few things down in this class.
SMartfest2008 015

I do admit that after taking his class I understand what all the buz was about. Michael is so funny, attentive, personable (uses your first name in a way that isn’t creepy) and really wants you to learn. He encouraged us to use new power tools, never tried to push his ideas or do something for us. He gave great feedback and though the hour long critique was long, it was also valuable. I haven’t really been in an adult art critique since college. How many times do we as artists working in our own homes get that opportunity? I almost wish there had been a platform for more peer to peer critique and feedback. I also learned how to make paper look burned without burning by using some simple paint techniques.

demeng shrine in progress

My favorite new supply was regular household caulk. It was great for texture and added depth. I used it over most of the front of my shrine. I didn’t have the exact types of acrylic washes that Michael recommends, but watered down my regular acrylics to get a similar effects. With the transparency we used a little white paint on the back of small areas to help them stand out more, this is how he makes the eyes really stand out.
SMdsc04104

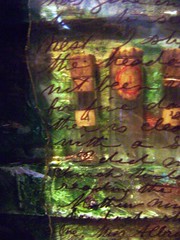
The inside is even more layered and complex than the outside. I covered most of the silver painted frame with strips of old book pages(inside and out) before doing different washes and texture layers. I included puzzle pieces, an old compass, some mini apothecary bottles and several different transparencies. I had plans for many things to dangle off other areas and drilled the necessary holes (using electric tools was a new thing for me.) Since I ran out of time in the class these items did not get added at the time, I am still debating whether to add them, or leave it as is. (see some more detail pictures in my flickr Artfest 2008 Set)

When I am working on a series… titles are a cinch! But when I have something like this that is out of the norm it is more difficult. “Eyes Wide Forward” is what comes to me right now, we will see how it sits.

ArtFest Flowers

Flowers for Swap

For my special Artfest friends I am creating some flowers for a swap. They are supposed to be some “before” flowers and some “after” flowers. So I thought dog/cat and paper/fabric combos. As I have gone from a cat lover to an avid dog fanatic (I do still love my cats, but I am not as obssessed about them as I am Charger) and I have gone from a mostly paper artist to a mostly fabric artist.

For the fabric flowers I am using a tutorial from Molly Chicken that I found from a podcast called Crafty Pod.

I picked Jen up yesterday and she helped me finish my flowers (thanks Jen!) and we will be leaving shortly for Port Townsend. EXCITING!!